
Client comfort is becoming a top priority for tattoo studios across Central Europe, with surveys showing that over 60 percent of clients prefer studios that offer pain management options. Numbing solutions inspired by American practices are now helping artists minimize discomfort and boost satisfaction during sessions. This guide covers practical steps for safe and effective numbing, making sure your tattoo studio meets rising client expectations for both safety and comfort.
Table of Contents
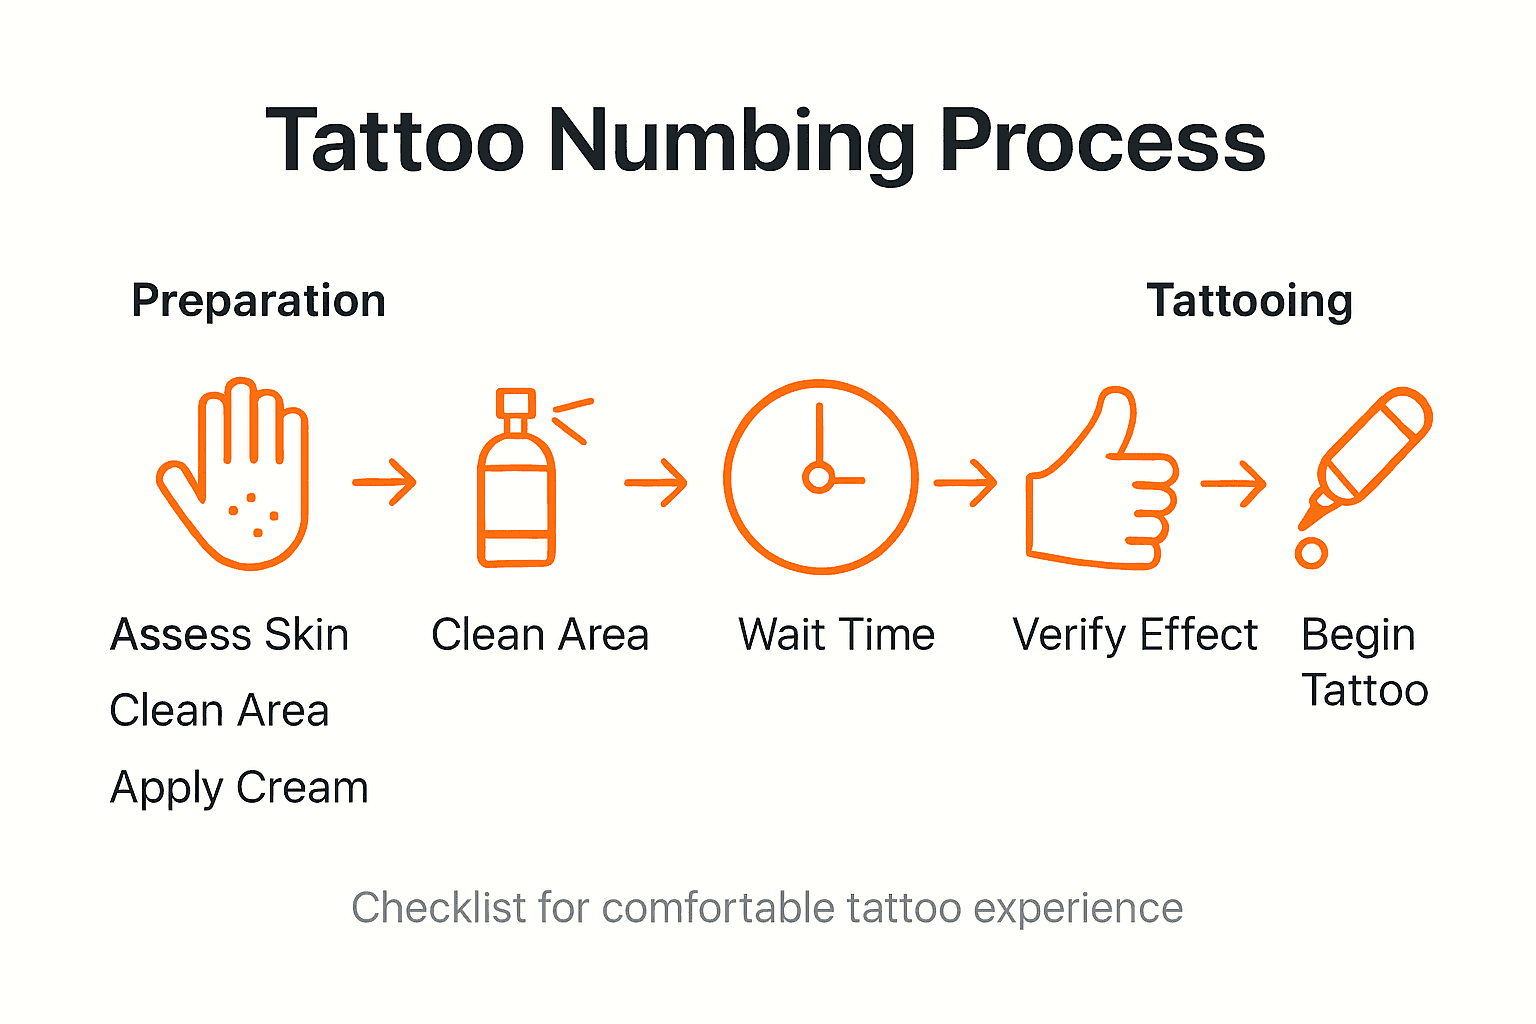
- Step 1: Assess Client Skin and Medical History
- Step 2: Prepare Tattoo Area for Numbing Application
- Step 3: Apply TKTX or Dermacain Numbing Cream Correctly
- Step 4: Wait for Optimal Numbness to Develop
- Step 5: Verify Numbing Effect Before Tattooing
- Step 6: Begin Tattooing with Maximum Client Comfort
Quick Summary
| Key Point | Explanation |
|---|---|
| 1. Assess Client Medical History | Conduct a thorough evaluation of the client’s medical background to identify risks and customize numbing approaches for safety and comfort. |
| 2. Prepare Skin Properly | Ensure the tattoo area is clean and dry before applying numbing cream to minimize infection risks and enhance the effectiveness of the numbing process. |
| 3. Apply Numbing Cream Effectively | Follow manufacturer guidelines to apply a uniform layer of numbing cream, enhancing absorption with an occlusive film for maximum effectiveness. |
| 4. Verify Numbness Before Tattooing | Test the treated area for adequate desensitization, ensuring the client is comfortable, and wait as needed for the full effect. |
| 5. Manage Pain During Tattooing | Communicate continuously with the client and adjust your technique based on their feedback to ensure a comfortable tattooing experience. |
Step 1: Assess Client Skin and Medical History
Successfully preparing a client for a pain-free tattoo session begins with a thorough evaluation of their skin condition and medical background. This critical first step helps you identify potential risks, ensure client safety, and customize the numbing approach for optimal comfort.
Start by conducting a comprehensive medical interview using a standardized assessment tool like the Epidemiological Tattoo Assessment Tool. Ask detailed questions about the client’s skin type, previous tattoo experiences, medical conditions, and any history of allergic reactions. Pay close attention to areas with pre-existing skin diseases or conditions that might complicate the tattooing process. Key areas to explore include skin sensitivity, current medications, autoimmune disorders, and any past adverse reactions to topical treatments.
Carefully document and analyze the client’s medical information before proceeding with numbing cream application. Look for specific contraindications such as active skin infections, open wounds, severe skin conditions, or medications that might interfere with healing. A comprehensive skin and medical history review enables you to develop a personalized approach that minimizes potential complications and ensures a safe, comfortable tattoo experience.
Pro tip: Keep a standardized medical intake form that covers all critical health screening questions and allows you to quickly assess client suitability for tattoo numbing procedures.
Here is a summary of important factors to evaluate before proceeding with tattoo numbing cream:
| Evaluation Area | Why It Matters | Impact on Safety |
|---|---|---|
| Skin Sensitivity | Detects risk of irritation or reaction | Prevents allergic events |
| Medical History | Reveals medications or disorders | Avoids healing complications |
| Previous Reactions | Uncovers allergy potential | Ensures safe application |
| Current Skin Status | Identifies active diseases | Reduces infection risk |
Step 2: Prepare Tattoo Area for Numbing Application
Preparing the tattoo site is a critical step that ensures effective numbing and minimizes potential infection risks. This process involves thorough cleaning and precise preparation to create an optimal surface for numbing cream application.
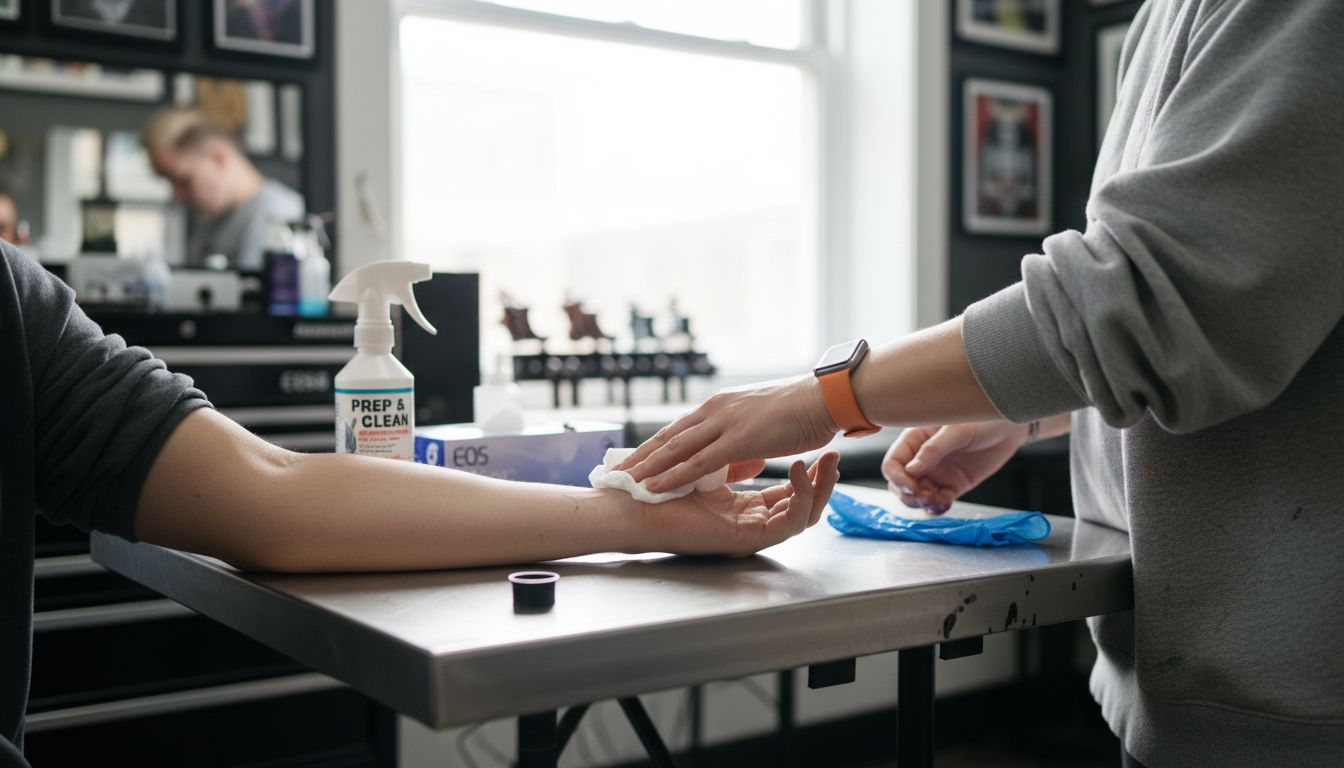
Begin by thoroughly cleaning the designated tattoo area using sterile wipes and professional antiseptic solutions. Remove all surface oils, lotions, makeup, and potential contaminants using gentle yet effective techniques. Carefully shave the area if necessary to create a smooth surface and improve numbing cream absorption. Follow standardized European hygiene protocols that emphasize complete skin disinfection and preparation before any topical product application.
Ensure the skin is completely dry and free from residual moisture after cleaning. Gently pat the area with a clean disposable towel, avoiding rubbing which might irritate the skin. Check for any cuts, abrasions, or skin irregularities that could interfere with numbing cream application. The goal is to create a clean, uniform surface that allows maximum absorption and effectiveness of the numbing product.
Pro tip: Always use single-use, sterile cleaning materials and wear fresh medical gloves during the skin preparation process to maintain the highest hygiene standards.
Step 3: Apply TKTX or Dermacain Numbing Cream Correctly
Applying numbing cream is a precise process that directly impacts your client’s comfort and the effectiveness of pain management during tattooing. Understanding the correct application technique ensures maximum numbing and minimal skin irritation.
Begin by carefully reading the manufacturer’s instructions for the specific numbing cream you are using. Follow the recommended application protocols from professional anesthesia guidelines, which emphasize applying a uniform layer approximately 2 to 3 millimeters thick. Spread the cream gently but thoroughly, ensuring complete coverage of the tattoo area without excessive rubbing. Avoid creating uneven patches that could lead to inconsistent numbing.
After application, consider using an occlusive film to enhance absorption and effectiveness. Cover the cream with a medical grade transparent dressing, which helps the active ingredients penetrate deeper into the skin. Allow the recommended waiting time typically between 30 to 45 minutes before tattooing. Monitor the client for any immediate allergic reactions or skin sensitivities during this period.
Pro tip: Always perform a small patch test with the numbing cream 24 hours before the tattoo session to check for potential allergic reactions or skin sensitivities.
Below is a concise comparison between TKTX and Dermacain numbing creams used for tattoo preparation:
| Cream Brand | Main Active Ingredient | Typical Wait Time | Absorption Method |
|---|---|---|---|
| TKTX | Lidocaine, epinephrine | 40 minutes | Occlusive film recommended |
| Dermacain | Lidocaine, prilocaine | 45 minutes | Occlusive film required |
Step 4: Wait for Optimal Numbness to Develop
The waiting period is a critical phase in ensuring maximum pain reduction during your tattoo session. Proper timing allows the numbing cream to penetrate skin layers and effectively block nerve sensations before the tattoo begins.
Professional anesthesia guidelines recommend a precise waiting window of 30 to 60 minutes after applying the cream. During this time, encourage your client to remain still and avoid touching or disturbing the treated area. Keep the occlusive film in place to help active ingredients like lidocaine absorb more effectively into the skin. Watch for any signs of skin sensitivity or allergic reactions during this waiting period.
Timing is crucial for achieving the right balance of numbness and skin readiness. Waiting too briefly will result in inadequate pain relief, while waiting too long might compromise skin texture or absorption. Use this time to review the tattoo design, prepare your equipment, and ensure the client feels comfortable and relaxed.
Pro tip: Use a timer to track the exact numbing cream application time and create a consistent pre tattoo preparation routine.
Step 5: Verify Numbing Effect Before Tattooing
Verifying the numbing cream’s effectiveness is a crucial step that ensures your client’s comfort and prevents unexpected pain during the tattoo session. This assessment determines whether the anesthetic has fully penetrated the skin and created the desired pain reduction.
Conduct a systematic sensitivity test by gently probing the treated area using light touch and minimal pressure. Use the tip of a sterile needle or a blunt probe to check the client’s pain response. The area should feel significantly desensitized with minimal to no sharp sensation. Pay attention to the client’s verbal and physical reactions during this assessment.
Clinical guidelines recommend a comprehensive numbness verification process that goes beyond simple touch testing. If the initial numbness seems insufficient, consider waiting an additional 10 to 15 minutes or carefully reapplying a thin layer of numbing cream. Communicate openly with your client throughout the process, ensuring they understand each step and feel comfortable with the procedure.
Pro tip: Always keep a small ice cube nearby to help validate the numbing effect by testing the area’s temperature sensitivity.
Step 6: Begin Tattooing with Maximum Client Comfort
With the numbing cream applied and verified, you are now ready to start the tattoo process while ensuring your client experiences minimal discomfort and maximum relaxation. This stage requires a delicate balance of technical skill and compassionate client care.
Professional anesthesia guidelines emphasize ongoing pain management strategies throughout the tattoo session. Begin by using a light touch and checking in with your client frequently about their comfort level. Adjust your tattooing technique to match their pain threshold and skin sensitivity. Work in small sections, allowing brief breaks if the client shows signs of stress or discomfort.
Tattooing techniques sensitive to client experience are crucial for a positive outcome. Maintain open communication and encourage your client to provide immediate feedback about their pain levels. If they report increased sensitivity, consider reapplying a small amount of numbing cream or adjusting your technique. Remember that each client’s pain tolerance is unique, and a personalized approach will create a more comfortable and satisfying tattoo experience.
Pro tip: Position a small fan near the client to provide cool air and help distract from potential discomfort during the tattooing process.
Achieve Truly Pain-Free Tattoo Sessions with Proven Numbing Solutions
The journey to a comfortable tattoo begins with a thorough understanding of your skin and medical history, proper preparation, and the expert use of numbing creams like TKTX or Dermacain. If you want to eliminate discomfort during your tattoo process for up to three hours, using trusted topical anesthetics that adhere to professional guidelines is essential. You deserve pain-free tattooing that feels safe, effective, and tailored specifically to your needs.

Explore our premium selection of TKTX and Dermacain numbing creams designed for maximum absorption and lasting relief. We provide fast, free shipping across Europe on orders over 30 Euro and guarantee your satisfaction. Don’t let pain hold you back from your next masterpiece. Visit buytktx.online now and prepare your skin properly by following the detailed workflow of cleaning, applying, and verifying numbing that you learned about today.
Frequently Asked Questions
How do I assess a client’s skin and medical history before a tattoo session?
To assess a client’s skin and medical history, conduct a thorough medical interview using a standardized assessment tool. Ask about skin type, past tattoo experiences, and any allergies to ensure a safe and comfortable tattoo experience.
What steps should I take to prepare the tattoo area for numbing application?
Begin by thoroughly cleaning the designated tattoo area with sterile wipes and antiseptic solutions to remove contaminants. Ensure the skin is dry and smooth, which optimizes the absorption of the numbing cream and minimizes infection risk.
How do I apply TKTX or Dermacain numbing cream effectively?
Apply a uniform layer of the numbing cream approximately 2 to 3 millimeters thick to ensure complete coverage. Consider using an occlusive film to enhance absorption, and wait for the recommended 30 to 45 minutes before starting the tattooing process.
How long should I wait after applying the numbing cream before tattooing?
After applying the numbing cream, wait for 30 to 60 minutes to ensure maximum pain reduction. Utilize a timer to track the waiting period, which allows the active ingredients to penetrate effectively into the skin.
How can I verify that the numbing cream is effective before starting the tattoo?
Verify the numbing cream’s effectiveness by gently probing the treated area to check the client’s pain response. If necessary, you can wait an additional 10 to 15 minutes or reapply a thin layer of cream if the numbness is insufficient.
What should I do to ensure my client remains comfortable during the tattooing process?
Check in with your client frequently about their comfort level and adjust your technique as needed. Work in small sections and maintain open communication, allowing for breaks if the client feels any discomfort during the tattoo session.


