
Getting your first tattoo is exciting, but walking in unprepared is one of the fastest ways to turn a great experience into a painful, frustrating one. Poor prep leads to more bleeding, worse ink retention, and a longer healing time. Most first-timers simply don’t know what to do in the days leading up to their appointment, and that gap costs them. This article gives you a full, step-by-step preparation guide covering skin readiness, what to bring, what to avoid, and how to manage pain so your first tattoo goes exactly as planned.
Table of Contents
- Core criteria for tattoo session preparation
- Your complete tattoo session preparation list
- What to avoid before your tattoo session
- Pain minimization and tattoo comfort hacks
- Tattoo session essentials: what to bring and last-minute checks
- Make your session easier with premium numbing solutions
- Frequently asked questions
Key Takeaways
| Point | Details |
|---|---|
| Stay hydrated daily | Drinking water regularly improves skin quality, comfort, and ink results. |
| Get good sleep and eat well | Proper rest and nutrition support pain tolerance and healthy healing. |
| Avoid alcohol and blood thinners | Skipping risky substances minimizes bleeding and sensitivity during your tattoo. |
| Bring essentials on session day | Snacks, water, and comfortable clothes help you stay relaxed and focused. |
| Choose pain-reducing strategies | Strategic placement and simple comfort habits can significantly enhance your first tattoo experience. |
Core criteria for tattoo session preparation
Before you think about designs or placement, your body needs to be in the right condition. Think of your skin as the canvas and your overall health as the foundation. If either is off, the result suffers.
The three pillars of solid tattoo prep are skin readiness, physical health, and timing. Skin that is hydrated and exfoliated holds ink more evenly. A body that is rested and well-fed tolerates pain better. And timing your prep correctly means you’re not scrambling the night before.
Here’s what your prep should look like across the week before your session:
- One week out: Hydrate daily, moisturize and exfoliate your skin regularly, avoid sunburns, and stop any blood thinners or alcohol use.
- Three to four days out: Keep moisturizing but stop using heavy creams or oils. Avoid any new skin products that could cause a reaction.
- Day before: Stop all lotion use on the tattoo area. Get a full night of sleep and eat well.
- Day of: Arrive clean, skip any lotions or numbing products unless your artist approved them, and wear loose clothing that allows easy access to the tattoo area.
If you have sensitive or problem-prone skin, the prep window matters even more. Check out these skin preparation steps and specific tips for handling sensitive skin before your appointment.
Pro Tip: If your skin is prone to dryness or irritation, start moisturizing two weeks out instead of one. Deeply hydrated skin takes ink more smoothly and heals faster.
Your complete tattoo session preparation list
Now that you understand the core criteria, here is your detailed step-by-step tattoo prep list you can follow for a smooth experience.
This is not a vague suggestion list. This is a real, numbered sequence that covers everything from a week out to the moment you sit in the chair.
- Seven days before: Start drinking at least 2 liters of water daily. Begin gentle exfoliation on the tattoo area every other day.
- Five days before: Stop taking aspirin, ibuprofen, or any blood-thinning supplements unless medically required. Talk to your doctor if you are on prescription blood thinners.
- Three days before: Avoid alcohol completely. Even a glass of wine the night before can increase bleeding and sensitivity during your session.
- Two days before: Do a final exfoliation, then switch to light moisturizing only. Avoid sun exposure on the tattoo area.
- Night before: Eat a solid dinner with protein and complex carbs. Get 7 to 8 hours of sleep to help your body manage pain and stress.
- Morning of: Eat a substantial protein and carb meal before you leave. Avoid excess sugar or caffeine, which can spike anxiety and increase sensitivity.
- Before you leave: Shower, skip all lotions on the tattoo area, dress in loose comfortable clothing, and pack your session bag.
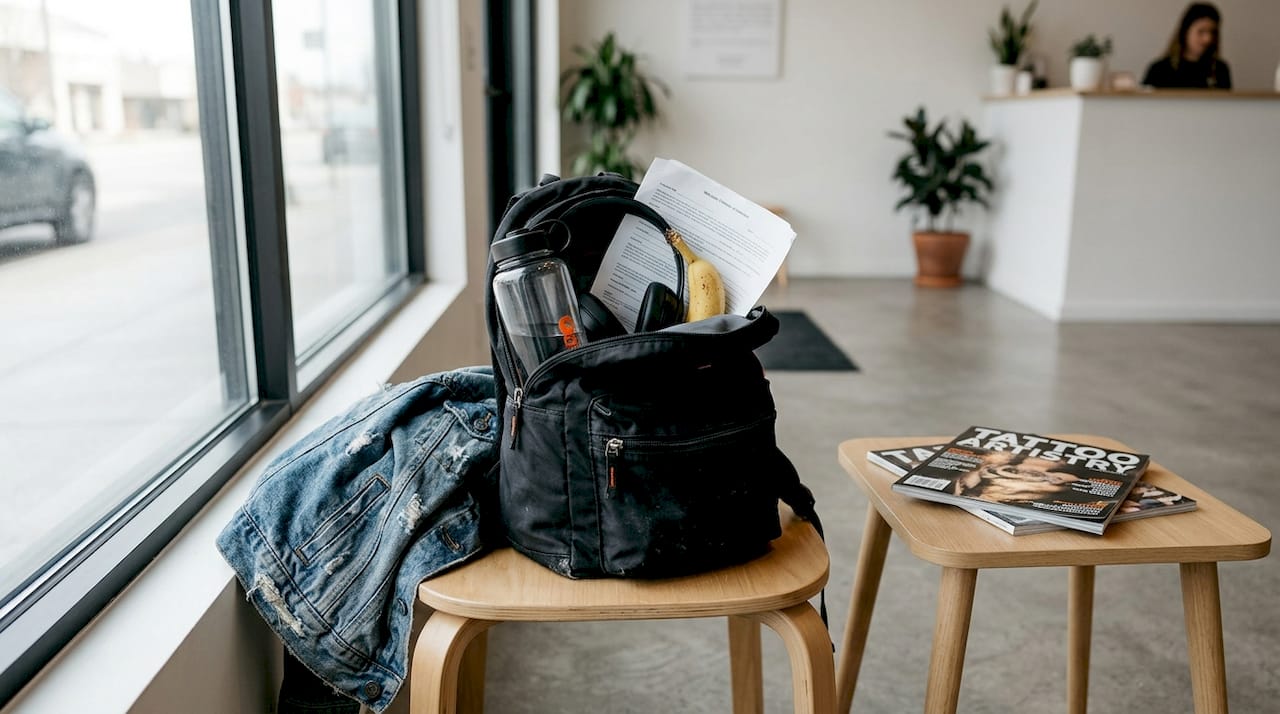
For your session bag, make sure you have snacks (think nuts, a banana, or a protein bar), a water bottle, headphones, your ID, and your payment method. Long sessions drain your blood sugar faster than you’d expect, and having a snack ready can be the difference between pushing through or tapping out early.
For more targeted advice on managing discomfort, read these first-timer pain relief tips and client comfort strategies that professional artists actually recommend.
Pro Tip: Do not apply any numbing cream or gel on the day of your session without first confirming with your artist. Some formulas affect how the skin responds to the needle. If your artist approves it, apply it correctly and on time, typically 45 to 60 minutes before the session starts.
Statistic to know: According to Yahoo Health, first-timers who skip meal prep and arrive on an empty stomach are significantly more likely to feel faint or need to stop the session early.
What to avoid before your tattoo session
Just as important as what you do is what you must avoid before your appointment.
Some of the most common first-timer mistakes are not about forgetting something. They are about doing something that actively works against you. Here is what to cut out entirely in the days before your session:
- Alcohol: Even one drink the night before increases bleeding and sensitivity, making the session harder on both you and your artist.
- NSAIDs (ibuprofen, aspirin): These thin your blood and can cause excessive bleeding, which pushes ink out of the skin as it is being applied.
- Heavy sun exposure: Sunburned or peeling skin cannot be tattooed safely. A bad sunburn can force your artist to reschedule.
- Unapproved creams or lotions: Arriving with oily or heavily moisturized skin makes it harder for the needle to work cleanly. Only use products your artist has cleared.
- Coming in sick: If you have a fever, infection, or active illness, your immune system is already working overtime. Tattooing on top of that increases healing time and infection risk significantly.
Before applying any topical product, review this numbing application checklist to make sure you are doing it correctly. And if you are wondering whether numbing is even worth it, this breakdown on why numbing before a tattoo matters will answer that question clearly.
“Avoid alcohol and blood thinners before your session. They increase bleeding and skin sensitivity, which makes the tattooing process harder and the result less clean.” — Guidance aligned with professional tattoo artist standards across Europe
Pain minimization and tattoo comfort hacks
Now, let’s spotlight concrete ways to make your session as comfortable as possible and clear up some common pain management myths.
First, the basics: your pain tolerance on the day of your session is directly tied to how well you slept, how well you ate, and how hydrated you are. These are not soft suggestions. Hydrated skin holds ink better and heals faster, and a well-rested nervous system simply handles pain signals more efficiently.
Here are the most effective comfort hacks:
- Breathe deliberately: Slow, controlled breathing during painful moments keeps your muscles relaxed and reduces the intensity of pain signals.
- Use music or podcasts: Distraction is genuinely effective. Bring headphones and queue up something you love before you sit down.
- Take breaks when needed: A good artist will always allow short breaks. Do not push through to the point of feeling sick or faint.
- Choose placement wisely: Strategic placement reduces pain by 40 to 60 percent. Fleshy areas hurt significantly less than bony ones.
Here is a quick reference table for pain levels by body area:
| Body area | Pain level | Notes |
|---|---|---|
| Upper arm (outer) | Low | Fleshy, great for first tattoos |
| Thigh (outer) | Low | Large flat surface, minimal nerve density |
| Forearm (outer) | Low to medium | Popular and manageable |
| Ribs | High | Thin skin over bone, very sensitive |
| Spine | High | Directly over vertebrae |
| Hands and feet | Very high | Dense nerve endings, thin skin |
| Inner arm / elbow ditch | High | Thin skin, close to nerves |
For a full walkthrough on how to apply numbing products correctly before your session, the numbing process guide is worth reading before your appointment.
Pro Tip: Ask your artist about placement before you commit. If you have low pain tolerance, even shifting a design a few centimeters can make a real difference in how the session feels.
Tattoo session essentials: what to bring and last-minute checks
You are nearly ready. Run through this final checklist to set yourself up for a hassle-free first tattoo.
Here is what you need to bring, split into must-haves and optional extras:
| Item | Essential or optional | Why it matters |
|---|---|---|
| Government-issued ID | Essential | Required by most studios |
| Payment (cash or card) | Essential | Confirm method with your studio ahead of time |
| Water bottle | Essential | Keeps you hydrated throughout the session |
| Snacks | Essential | Stabilizes blood sugar during long sessions |
| Loose, comfortable clothing | Essential | Allows easy access to the tattoo area |
| Headphones | Optional | Distraction tool for pain management |
| Phone charger | Optional | Useful for longer sessions |
| Reference images | Optional | Helpful if you want to make last-minute design tweaks |
| A light jacket or layer | Optional | Studios can be cold, especially during long sits |
Beyond the physical items, your mental state matters too. Trust your artist, expect some manageable discomfort, and remind yourself that millions of people get through their first tattoo every year without issue. Anxiety spikes pain perception, so the calmer you arrive, the better your experience will be.
One final check: do not show up if you are ill, sunburned, or have open skin irritation on the tattoo area. These are the edge cases that force rescheduling, and no one wants that after weeks of anticipation.
Make your session easier with premium numbing solutions
All this preparation puts you in the best possible position, and the right numbing cream can take your comfort even further. At buytktx.online, we offer TKTX and Dermacain numbing creams that are trusted by first-timers and experienced collectors across Europe.

Our formulas are designed to keep you comfortable for up to 3 hours, giving your artist the time they need without you tensing up or tapping out early. Dermacain 30g is a great starting point for first-timers, and our numbing cream bundles offer excellent value with free shipping on orders over 30 Euro. We back every purchase with a full satisfaction guarantee. If you are not happy, just send it back and we will refund you, no hassle.
Frequently asked questions
How many hours before a tattoo should I eat?
Eat a solid meal with protein and complex carbs 1 to 2 hours before your session. Arriving on an empty stomach increases your risk of feeling faint, especially during longer sessions.
Can I use numbing cream for my first tattoo?
Yes, but only with your artist’s approval. Some numbing formulas can affect how the skin responds to the needle, so always confirm the product and timing with your artist before applying.
What happens if I drink alcohol before a tattoo session?
Alcohol increases bleeding and sensitivity during tattooing, which makes the process harder and can affect the quality of the final result. Avoid it for at least 24 hours before your session.
Is hydration really that important for tattoos?
Absolutely. Hydrated skin holds ink better and heals faster, and well-hydrated tissue is generally less sensitive during the tattooing process.
Are certain body areas less painful for tattoos?
Yes. Fleshy areas like the outer upper arm or outer thigh hurt significantly less than bony areas like the ribs, spine, or hands. If pain is a concern, placement is one of the most powerful variables you can control.


