
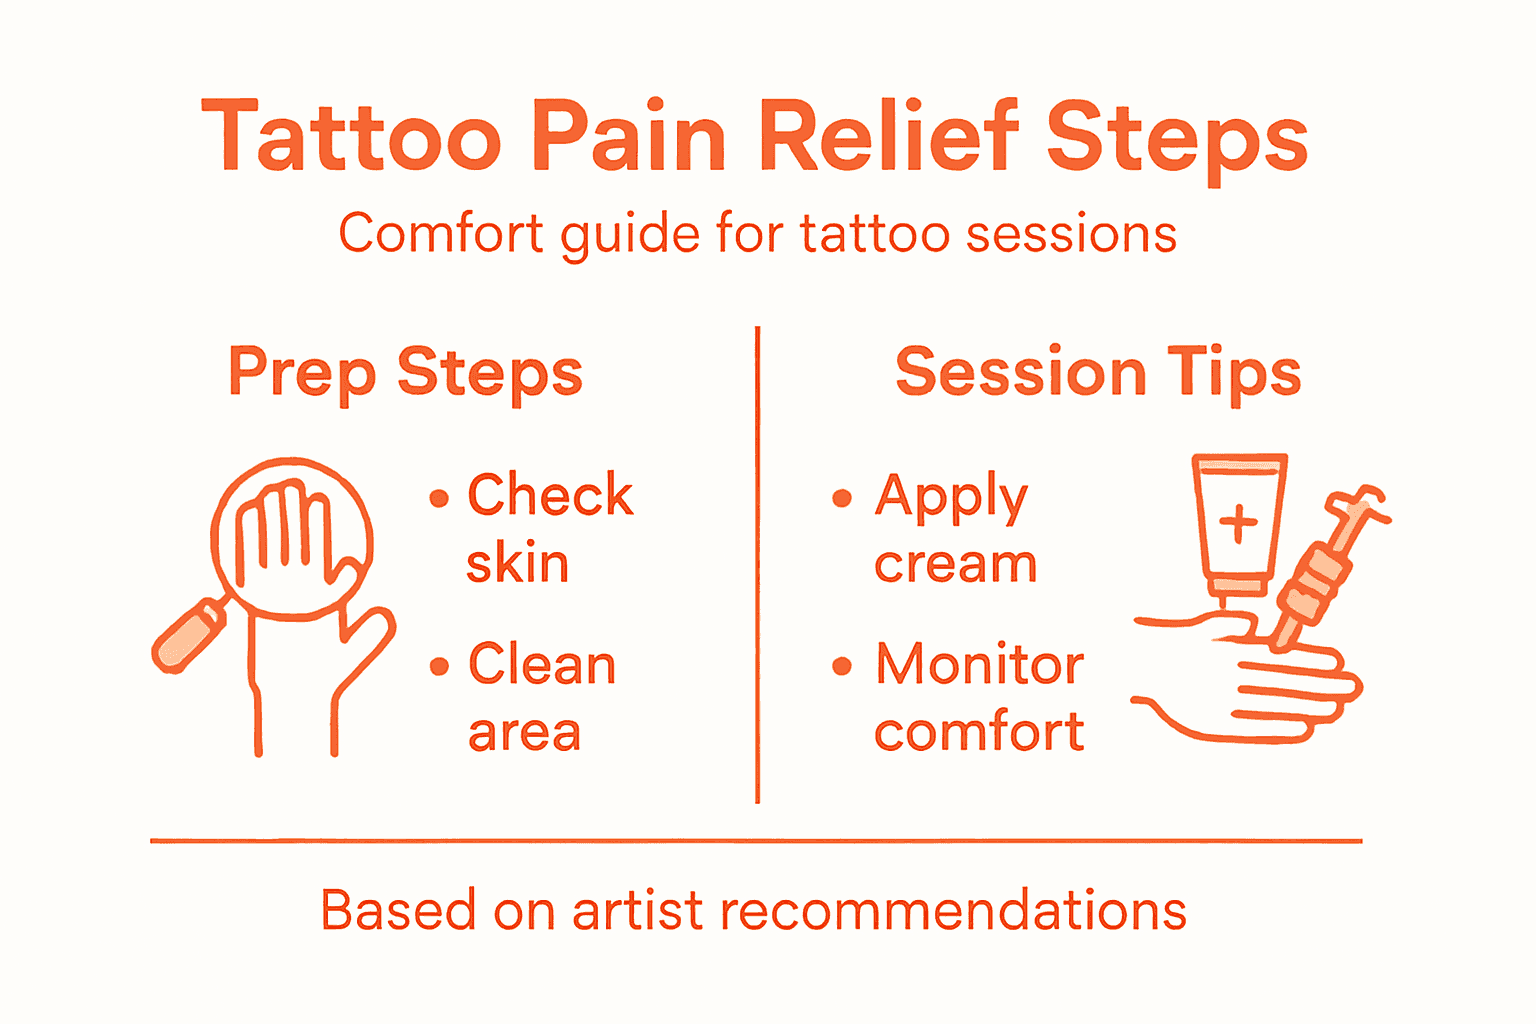
Getting a tattoo in Central Europe is an exciting milestone, but the anticipation of pain often makes even the boldest enthusiasts pause. Comfort matters whether you’re a seasoned collector or getting your very first piece. Learning to use a numbing cream properly can transform your experience, so understanding the steps for safe, effective pain relief is key. From assessing your skin’s health to mastering the right technique, you’ll discover how to prepare for a smoother, more comfortable tattoo session.
Table of Contents
- Step 1: Assess Skin Area For Numbing Cream Suitability
- Step 2: Clean And Prepare Skin For Optimal Absorption
- Step 3: Apply Tattoo Numbing Cream Effectively
- Step 4: Wait And Verify Numbness Before Tattooing
- Step 5: Monitor Skin Comfort Throughout The Session
Quick Summary
| Key Point | Explanation |
|---|---|
| 1. Assess skin condition first | Check for cuts, irritations, and sensitivities to ensure proper application of numbing cream and avoid complications. |
| 2. Clean and dry thoroughly | Use mild soap and water to clean the area, then pat dry completely to enhance absorption of numbing cream. |
| 3. Apply generously and cover | Use a thick layer of cream, then cover the area with plastic wrap to optimize the numbing effect during waiting time. |
| 4. Wait the appropriate time | Most creams need 20 to 60 minutes for effective numbing; adhere strictly to product instructions for best results. |
| 5. Monitor comfort continuously | Stay aware of any discomfort during the tattoo session, and communicate with your artist if pain increases or reactions occur. |
Step 1: Assess skin area for numbing cream suitability
Before you apply any numbing cream, you need to check your skin carefully to make sure it’s ready for the product. This step takes just a few minutes but makes a real difference in how well the cream works and whether you’ll have any unexpected reactions. Think of it like preparing a canvas before painting, the surface matters.
Start by looking at the area where you plan to get your tattoo. Run your fingers over the skin gently and look closely at it in good lighting. You’re checking for anything that might interfere with how the numbing cream absorbs and works. The skin must be clean and completely dry before application. Wash the area with mild soap and water, then pat it dry thoroughly with a clean towel. Any moisture on your skin can prevent the cream from making proper contact and reduce its effectiveness.
Now examine the skin itself. Look for cuts, scrapes, open wounds, or any kind of lesions. You’ll also want to check for rashes, severe irritation, sunburn, or any spots that look inflamed or raw. Applying numbing cream to broken skin can cause irritation and increase the risk of the product being absorbed into your bloodstream in ways you don’t want. If you find any damaged areas, you’ll need to wait until your skin heals completely or adjust where you’re placing the tattoo. This is especially important since your skin is going to experience trauma during the tattooing process itself, and you want it starting from the healthiest possible state.
Consider your personal skin sensitivities too. If you know you have reactive skin, allergies to numbing agents, or conditions like eczema or psoriasis in the area you’re getting tattooed, mention this to your artist. Different people respond differently to topical products. Individual patient factors like allergies and skin conditions matter when determining whether a numbing cream will work safely for you. If you’ve had reactions to numbing products before, that’s valuable information to have before you start. You can always test the cream on a small area of skin 24 hours before your appointment to see how your body reacts.
Check the condition of the skin around your chosen area as well. The tattoo artist will likely need to work with surrounding skin during the session, so that area should be in good shape too. Avoid sunbathing or tanning beds for at least a week before your appointment, as sunburned skin is sensitive and won’t be suitable for either the numbing cream or the actual tattooing.
Here is a quick comparison of common skin issues and how they impact numbing cream use:
| Skin Condition | Risk During Numbing | Recommended Action |
|---|---|---|
| Open wounds | High absorption, irritation risk | Wait for full healing |
| Eczema/Psoriasis | Sensitive, may cause reaction | Consult artist and conduct patch test |
| Sunburn | Increased pain, poor absorption | Reschedule until healed |
| Normal, healthy skin | Low risk, effective absorption | Proceed following instructions |
Pro tip: Do your skin check at least 24 hours before you plan to apply the numbing cream, this gives you time to address any issues and ensures the area is genuinely clean and ready when application day arrives.
Step 2: Clean and prepare skin for optimal absorption
Now that you’ve assessed your skin and confirmed it’s suitable for numbing cream, it’s time to prepare it properly so the cream can work at its best. This preparation step is where many people cut corners, but getting it right makes a significant difference in how effectively the numbing cream penetrates and numbs your skin during the tattoo session.
Start by washing the area thoroughly with mild soap and lukewarm water. Use gentle circular motions with your fingertips, spending about 30 seconds on the tattooing area. What you’re doing here is removing all the invisible stuff that builds up on skin throughout the day, oils, dead skin cells, dirt, and any residue from lotions or deodorants. These barriers sit on top of your skin and prevent the numbing cream from making proper contact with the layers underneath. After washing, rinse completely with clean water until all soap residue is gone. Any leftover soap can actually interfere with the cream’s ability to absorb.
Now comes the critical part, drying. Pat your skin dry with a clean, soft towel. Don’t rub aggressively, just press gently to absorb the moisture. Your skin needs to be completely dry before you apply the numbing cream. Any remaining water or dampness on the surface creates a barrier that blocks absorption. Think of it like trying to paint on wet canvas, the paint won’t adhere properly and will just sit on top. Thorough washing and drying removes oils and dirt that impairs the cream’s penetration into skin layers. This step takes just two minutes but amplifies the cream’s effectiveness considerably.
If you have particularly oily skin, you might consider using an alcohol-based skin prep solution designed for medical or tattoo purposes. Some people use rubbing alcohol on a cotton pad to wipe the area after washing and drying, which removes any remaining oils and helps optimize the permeability of topical anesthetics. However, don’t overdo this. You want clean skin, not irritated skin. If you go the alcohol route, use it sparingly and let the area air dry completely for a minute or two before applying the numbing cream.
Timing matters here too. Ideally, you want to apply your numbing cream within a few minutes after this preparation. The longer you wait after washing and drying, the more your skin starts producing oils again naturally. If there’s going to be a delay of more than 10 or 15 minutes between your skin prep and cream application, do a quick dry wipe with a clean tissue right before applying the cream to remove any new oils that have surfaced.
Avoid using any lotions, moisturizers, sunscreen, or other products on the area right before applying the numbing cream. These create additional barriers that reduce absorption. If you typically use sunscreen, apply it to other areas but keep this specific tattoo zone product-free. Similarly, don’t shave the area immediately before your appointment. Shaving irritates skin and creates micro-cuts that complicate the numbing process.
Pro tip: Do your full skin cleaning and preparation 15 to 30 minutes before applying the numbing cream, this gives you enough time to ensure everything is completely dry while staying within the window where your skin hasn’t yet produced new oils.
Step 3: Apply tattoo numbing cream effectively
This is where your preparation pays off. Applying the numbing cream correctly determines how well it works and how comfortable your tattoo session will be. The technique matters just as much as the product itself, so take your time and follow these steps carefully.
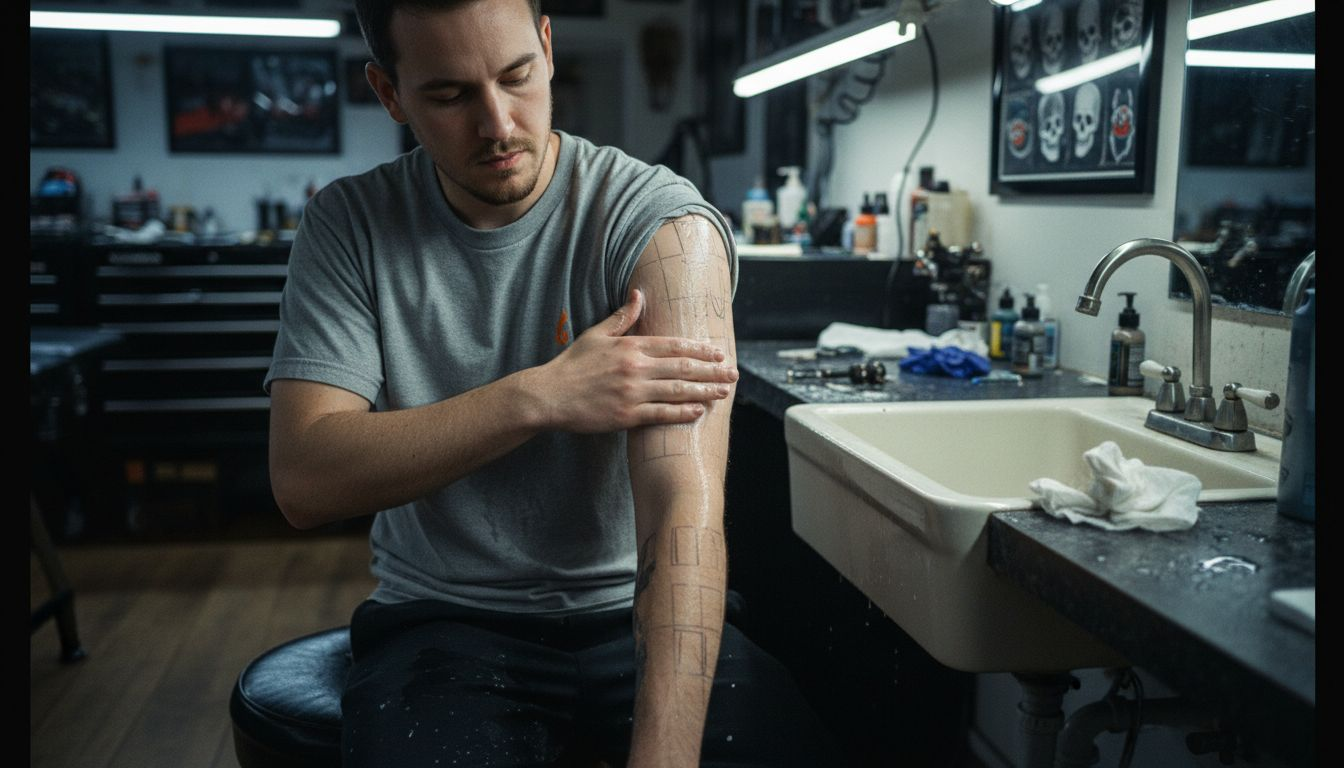
Start with the right amount. You need to apply a generous, thick layer that completely covers the entire tattoo area without any skin showing through. The cream should look almost like a mask over your skin. Many people make the mistake of applying too little, thinking a thin layer will save product, but this backfires completely. A thin application won’t provide adequate numbing. Squeeze out enough cream to create a layer roughly the thickness of a few millimeters across your entire tattoo site. If you’re unsure how much that is, err on the side of more rather than less. The generous application of thick layers ensures maximum delivery of active ingredients. Spread the cream evenly using your fingertip or a plastic applicator, making sure you cover every part of the area you’ll be getting tattooed.
Once you’ve applied the cream, the next step is crucial. Cover the entire creamed area with plastic wrap or a non-absorbent bandage. This covering is not optional. It serves several important purposes. First, it creates a sealed environment that enhances how deeply the cream penetrates into your skin. The plastic traps the cream against your skin instead of letting it dry out or evaporate. Second, it prevents contamination and keeps the cream from rubbing off onto your clothes or other surfaces. Third, it helps optimize absorption and deliver active ingredients effectively. Smooth the plastic wrap or bandage down carefully, making sure there are no air pockets or gaps where the cream could escape.
Now comes the waiting game. Most numbing creams require 45 minutes to 3 hours of contact time to work effectively. Check the specific instructions on your product’s packaging, as different creams have different requirements. During this waiting period, try to relax and keep the area immobilized. Avoid moving around excessively or touching the covered area. The less you disturb it, the better the cream can do its job. You might feel a slight tingling or cooling sensation under the plastic wrap, which is normal and actually a sign the cream is working.
About 15 minutes before your tattoo appointment, remove the plastic wrap or bandage gently. Wipe away any excess cream with a soft, clean tissue. You want to remove the excess without stripping away all the cream. A light residue left on the skin is fine and actually helpful. The numbing effect will already be developing, and you want to maintain it. Avoid washing the area once you’ve applied and started the waiting period, as this removes the numbing agents.
One more thing about application. Avoid getting the cream on sensitive areas like mucous membranes or any wounds you might have missed during your assessment. If you accidentally get cream in your eyes or mouth, wash it away immediately with water. Stick to the tattoo area itself.
Pro tip: Apply your numbing cream 60 to 90 minutes before your scheduled tattoo appointment so the numbing effect has time to fully develop while you’re still covered, then remove the wrap shortly before heading to the artist’s chair.
Step 4: Wait and verify numbness before tattooing
You’ve applied the numbing cream and covered the area. Now patience becomes your tool. The waiting period is not dead time, it’s when the active ingredients are penetrating your skin and doing their job. Understanding what happens during this window and how to verify the numbing effect are essential to ensuring your tattoo session goes smoothly.
The timeline depends on your specific product. Most numbing creams require a waiting period of 20 to 60 minutes before the anesthetic effect fully develops. Some work faster, others need more time. Check your product’s instructions carefully and follow those recommendations. This is not a guideline you want to guess about. If your cream says 45 minutes, wait the full 45 minutes. Rushing this step compromises the entire process. During this waiting period, keep the plastic wrap or bandage in place. The covering is doing important work by creating an optimal environment for absorption. Resist the urge to peek or adjust it unless something has shifted significantly.
While you’re waiting, try to stay relaxed and calm. Stress and anxiety can actually increase your pain sensitivity, so use this time wisely. Put on some music, read, or do something that helps you feel grounded. Keep the wrapped area still and avoid excessive movement. If you’re getting a larger tattoo or one on a mobile part of your body, try to position yourself so the area isn’t constantly flexing or moving. About five minutes before you’re ready to head to your tattoo appointment, gently remove the plastic wrap or bandage. Wipe away excess cream with a clean tissue, but leave a thin layer on the skin. This residual cream continues to provide numbing benefit as you’re sitting down with your artist.
Now comes the verification step. Before your artist starts, you need to confirm that the numbness is actually working. Healthcare providers recommend checking the skin for numbness to ensure the numbing effect is sufficient. Here’s how to test it properly. Have your artist or someone you trust lightly touch the tattooed area with their fingernail or a cotton swab. You should feel pressure but not sharp pain. If you feel significant pain or sharp sensations, the numbing hasn’t taken effect adequately. Another test is the pinprick method. A gentle, light tap with a fingernail or the side of a pin on the numbed area should feel dull and blunt, not sharp. You might feel the sensation of contact, but it should lack the usual sting.
What should numbness feel like? Think of it like touching your face after the dentist numbs it for a procedure. You can still feel touch and pressure, but pain sensations are muted or absent. It’s not complete loss of feeling, it’s a reduction in pain perception. Some people describe it as a slight tingling or a numb, heavy sensation in the skin. This is all normal and exactly what you want.
If the numbness isn’t adequate after waiting the recommended time, talk to your artist. Some situations might require reapplication or additional numbing. It’s far better to address this before starting than to suffer through a painful session. If you’re using a numbing cream from a reputable supplier, you should have confidence in its effectiveness, but individual responses vary slightly based on skin type, thickness, and other factors. Your artist has seen many clients use numbing creams and can offer guidance.
Pro tip: Do your numbing verification test about 5 to 10 minutes before your scheduled appointment time so you have a small window to address any issues before your artist starts without keeping them waiting.
Step 5: Monitor skin comfort throughout the session
Once your tattoo artist begins, your job shifts from preparation to active monitoring. Even with numbing cream working effectively, you need to stay aware of how your skin is responding throughout the entire session. This awareness helps you catch any issues early and communicate with your artist before discomfort escalates.
Pay attention to what you’re feeling as the needle starts. The numbing cream should have significantly reduced pain, but you might still feel pressure, vibration, or a mild sensation. This is completely normal and very different from the sharp pain you would experience without numbing. If you start feeling pain that seems too intense or grows progressively worse, speak up immediately. Your artist needs to know. Don’t try to tough it out or assume it will get better on its own. The beauty of having numbing cream is that you should not be in significant pain. Your artist can pause, assess the area, and decide whether additional numbing is needed. Continuous monitoring during procedures allows for timely intervention if discomfort arises or adverse reactions develop.
Watch for physical signs on your skin as well. Look for changes in skin color, texture, or appearance as the session progresses. A little redness is expected from the tattooing process itself, but watch for excessive redness, swelling, or unusual reactions that might indicate the numbing cream is causing irritation or that you’re having an allergic response. If you notice the area becoming increasingly swollen or developing a rash, let your artist know right away. Professional guidance recommends watching for signs of skin reactions like redness, swelling, or itching to ensure safety throughout the session. Some people develop minor sensitivity to certain numbing cream ingredients, and early detection allows your artist to work with you on solutions.
Communication is your most important tool during the session. You and your artist are partners in this experience. If the numbing effect starts wearing off in certain areas, tell your artist. Most quality numbing creams provide effective numbness for several hours, but different areas of your body have different absorption rates. The inner wrist or arm might stay numb longer than a bony area like your ankle or rib cage. If you notice patches of increasing sensation or pain, your artist might be able to reapply numbing cream to those specific spots or adjust their technique temporarily while the cream takes effect again.
Keep your breathing steady and stay as relaxed as possible. Tension in your body actually increases pain perception, so deep breaths and conscious relaxation help the numbness work more effectively. Your artist has likely worked with many clients using numbing creams, so they understand the process and won’t be bothered by your updates on how you’re feeling. Their goal is the same as yours, a great tattoo completed comfortably.
If at any point you need a break, ask for one. Most tattoo sessions include natural pause points where your artist cleans the area or changes their setup. Use these moments to breathe, check in with how you’re feeling, and communicate if needed. A five-minute break can make a real difference in managing any discomfort and keeping you in a good headspace for the rest of the session.
Remember that some sensations are part of the normal tattooing experience even with numbing cream. You might feel warmth from the needle, slight vibration, or pressure as the artist works. These sensations are not pain and are actually signs the cream is doing its job. Sharp, stinging, or burning pain is what you’re trying to avoid, and that’s when you communicate with your artist.
Pro tip: Use hand signals or a simple system with your artist like raising your left hand if you need them to check your comfort level, this keeps communication clear without interrupting their focus on your tattoo.
Here is an at-a-glance guide to numbing cream steps and their purpose:
| Step | Main Purpose | Key Timing |
|---|---|---|
| Skin assessment | Prevent adverse reactions | 24+ hours before session |
| Cleaning and drying | Maximize absorption | 15–30 min before cream |
| Applying cream and covering | Enable deep numbing effect | 60–90 min before session |
| Waiting and verifying numbness | Ensure effective pain reduction | 5–10 min before tattoo |
| Monitoring skin comfort during tattoo | Identify and address issues | Ongoing, during session |
Achieve a Truly Comfortable Tattoo Experience with Trusted Numbing Solutions
Understanding the essential steps to prepare your skin for a pain-free tattoo session can make all the difference between discomfort and confidence. From the careful skin assessment to the right application of numbing cream and thorough monitoring during the process, minimizing pain is your goal. Our premium products like TKTX and Dermacain are specially formulated to guarantee up to 3 hours of effective numbness, helping you stay calm and comfortable as your artist creates your new ink.

Start your journey to a painless tattoo today by choosing from our quality numbing creams available for shipment across Europe. We offer free shipping on orders over 30 Euro and a customer satisfaction guarantee with full money-back if you are not completely happy after returning the product. Don’t let pain stand between you and your perfect tattoo. Visit our site now to explore the best options for effective tattoo pain relief and experience how the right preparation and products work together seamlessly. Learn more about how to apply numbing cream effectively to maximize your comfort and enjoy your tattoo session like never before.
Frequently Asked Questions
How can I assess my skin for numbing cream suitability before my tattoo session?
Before applying numbing cream, carefully examine the area where you plan to get tattooed. Check for cuts, rashes, or other skin conditions that could interfere with absorption and wait for any damaged skin to heal before proceeding.
What is the best way to clean my skin before applying numbing cream?
Wash the tattoo area thoroughly with mild soap and lukewarm water for about 30 seconds, removing any oils and dirt. After washing, dry the area completely with a clean towel, ensuring no moisture remains to maximize the numbing cream’s effectiveness.
How do I apply tattoo numbing cream properly?
Apply a thick layer of numbing cream over the entire tattoo area, ensuring no skin shows through. Cover the area with plastic wrap to create a sealed environment and enhance absorption, then wait for the recommended time before your tattoo session.
What should I do if the numbing cream does not seem effective?
Verify your numbness by having someone gently touch the area; you should feel pressure but not pain. If you still feel significant discomfort, communicate this to your artist, who may reapply more cream or adjust the technique to enhance comfort.
How can I monitor my comfort level during the tattoo session?
Pay attention to any sensations as the tattooing begins; you should feel altered pressure but no sharp pain. If you experience increased discomfort, alert your artist immediately to ensure they can address the issue effectively.
Why is it important to wait and verify numbness before starting the tattoo?
Waiting and verifying numbness ensures that the cream has taken effect, reducing pain during your tattoo session. Following the recommended waiting time allows the numbing agents to penetrate effectively, enhancing your overall experience.


