
More than half of American tattoo enthusiasts report worrying about pain before their appointment. Selecting the right numbing cream can make a dramatic difference in both comfort and safety. With so many choices, from over-the-counter products to professional recommendations, knowing what actually works will let you focus on your tattoo without second guessing. Here you will discover the steps every American should take to get safe, reliable pain relief before your next session.
Table of Contents
- Step 1: Select The Right Numbing Cream
- Step 2: Clean And Prepare The Tattoo Area
- Step 3: Apply Numbing Cream Evenly
- Step 4: Wrap And Wait For Maximum Effect
- Step 5: Verify Numbing Before Beginning Tattoo
Quick Summary
| Key Takeaway | Explanation |
|---|---|
| 1. Choose FDA approved creams | Opt for numbing creams that are FDA approved to ensure safety and effectiveness for your tattoo process. |
| 2. Clean the tattoo area thoroughly | Properly wash and prepare the tattoo site to enhance cream absorption and reduce infection risks. |
| 3. Apply cream evenly and generously | Spread a thick layer of cream across the tattoo area without rubbing, ensuring full coverage for best results. |
| 4. Use an occlusive dressing | Cover the cream with a medical dressing to maximize absorption and maintain effective numbing. |
| 5. Verify numbness before tattooing | Test the skin’s sensitivity after applying cream to ensure effective pain management during the tattoo session. |
Step 1: Select the Right Numbing Cream
Choosing the perfect numbing cream for your tattoo journey requires strategic consideration and research. Your goal is finding a product that provides effective pain relief while meeting safety standards and professional recommendations.
Start by prioritizing FDA approved products specifically designed for dermatological procedures. Not all numbing creams are created equal some are unapproved and potentially risky. Look for creams that clearly indicate tattoo or medical procedure compatibility. Professional tattoo artists often recommend specific brands that have proven track records of safe application and consistent numbing performance.
Carefully review the cream’s ingredient list and concentration of active numbing agents. Proper application techniques matter significantly, so select a product with clear instructions. Verify the recommended waiting time before your tattoo session and ensure the cream can be safely applied to intact skin. Some numbing creams work faster than others some provide longer lasting relief so match the product to your specific tattoo size and anticipated duration.
Pro tip: Always perform a small patch test with your chosen numbing cream at least 24 hours before your tattoo appointment to check for potential allergic reactions or skin sensitivity.
Here is a comparison of numbing cream features to consider when choosing the right product:
| Feature | Importance for Tattoos | Potential Impact if Overlooked |
|---|---|---|
| FDA Approval | Ensures product safety standards | Risk of adverse skin reactions |
| Active Ingredient Type | Affects numbing strength/duration | Insufficient pain relief |
| Concentration Level | Determines effect intensity | Possible skin irritation or failure |
| Application Instructions | Guides correct usage | Reduced numbing effect |
| Wait Time Required | Matches session timing | Incomplete pain control |
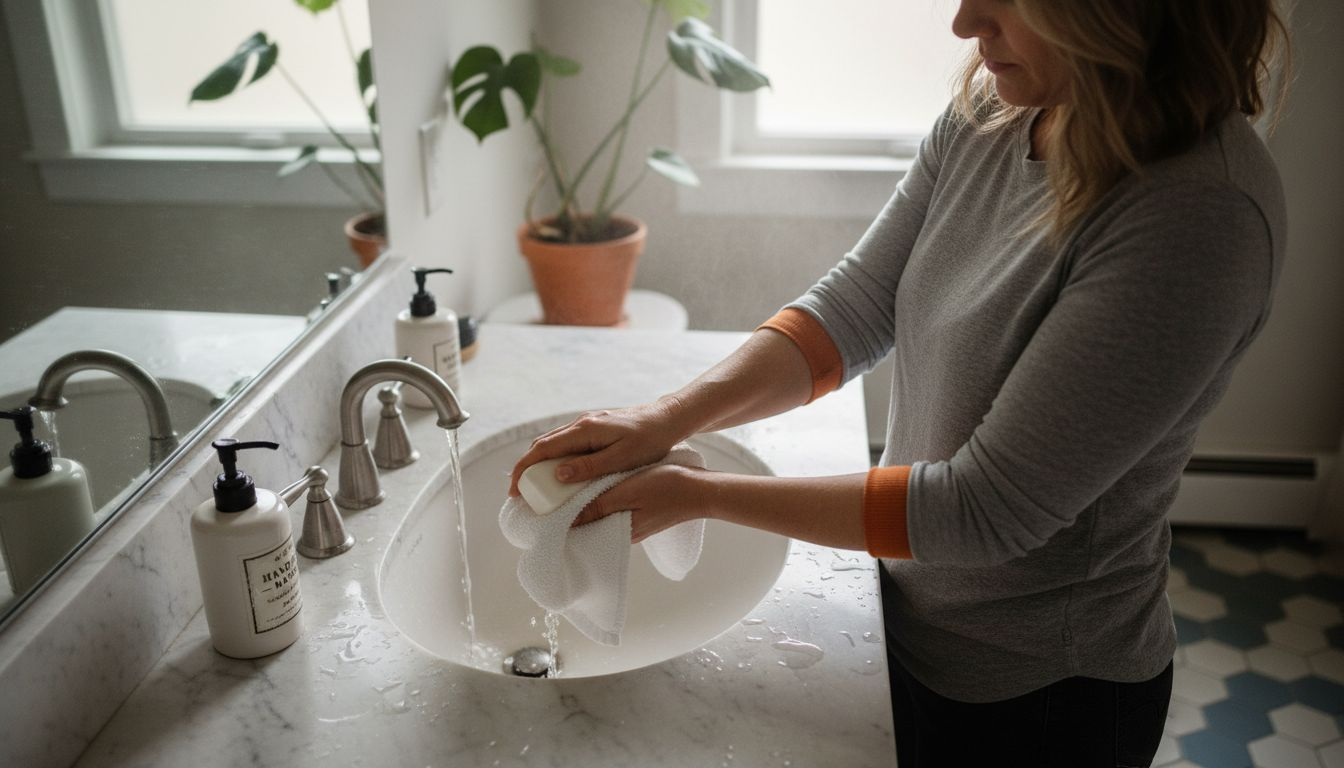
Step 2: Clean and Prepare the Tattoo Area
Successfully preparing your skin is crucial before applying numbing cream and getting a tattoo. This step ensures optimal cream absorption and reduces potential risks of infection or skin irritation.
Begin by thoroughly washing your hands and the tattoo area using mild antibacterial soap. Gently clean the skin with warm water removing any dirt oils or residue that might interfere with the numbing cream or tattoo process. Pat the area dry using a clean soft towel avoiding rough rubbing that could irritate the skin. Select and sanitize the specific injection or tattoo site with an alcohol wipe to eliminate surface bacteria and create a sterile environment.
Inspect the skin carefully for any cuts scratches redness or existing skin conditions that might impact the numbing cream application or tattoo process. If you notice any unusual skin characteristics consult your tattoo artist or healthcare professional before proceeding. Ensure the skin is completely dry and at room temperature before applying the numbing cream to maximize its effectiveness and absorption.
Pro tip: Use unscented hypoallergenic cleaning products to minimize potential skin reactions and create the most neutral surface for numbing cream application.
Step 3: Apply Numbing Cream Evenly
Applying numbing cream correctly is critical to ensuring effective pain management during your tattoo process. Your goal is to create a uniform protective layer that maximizes comfort and minimizes potential skin irritation.
Create a thick and uniform layer of cream across the entire tattoo area without rubbing the product into the skin. Squeeze a generous amount of cream directly onto the clean skin surface and spread it gently using your fingertips or a clean applicator. Ensure complete coverage extending slightly beyond the anticipated tattoo outline to guarantee comprehensive numbing. Avoid massaging or pressing the cream deeply allow it to rest naturally on the skin surface.
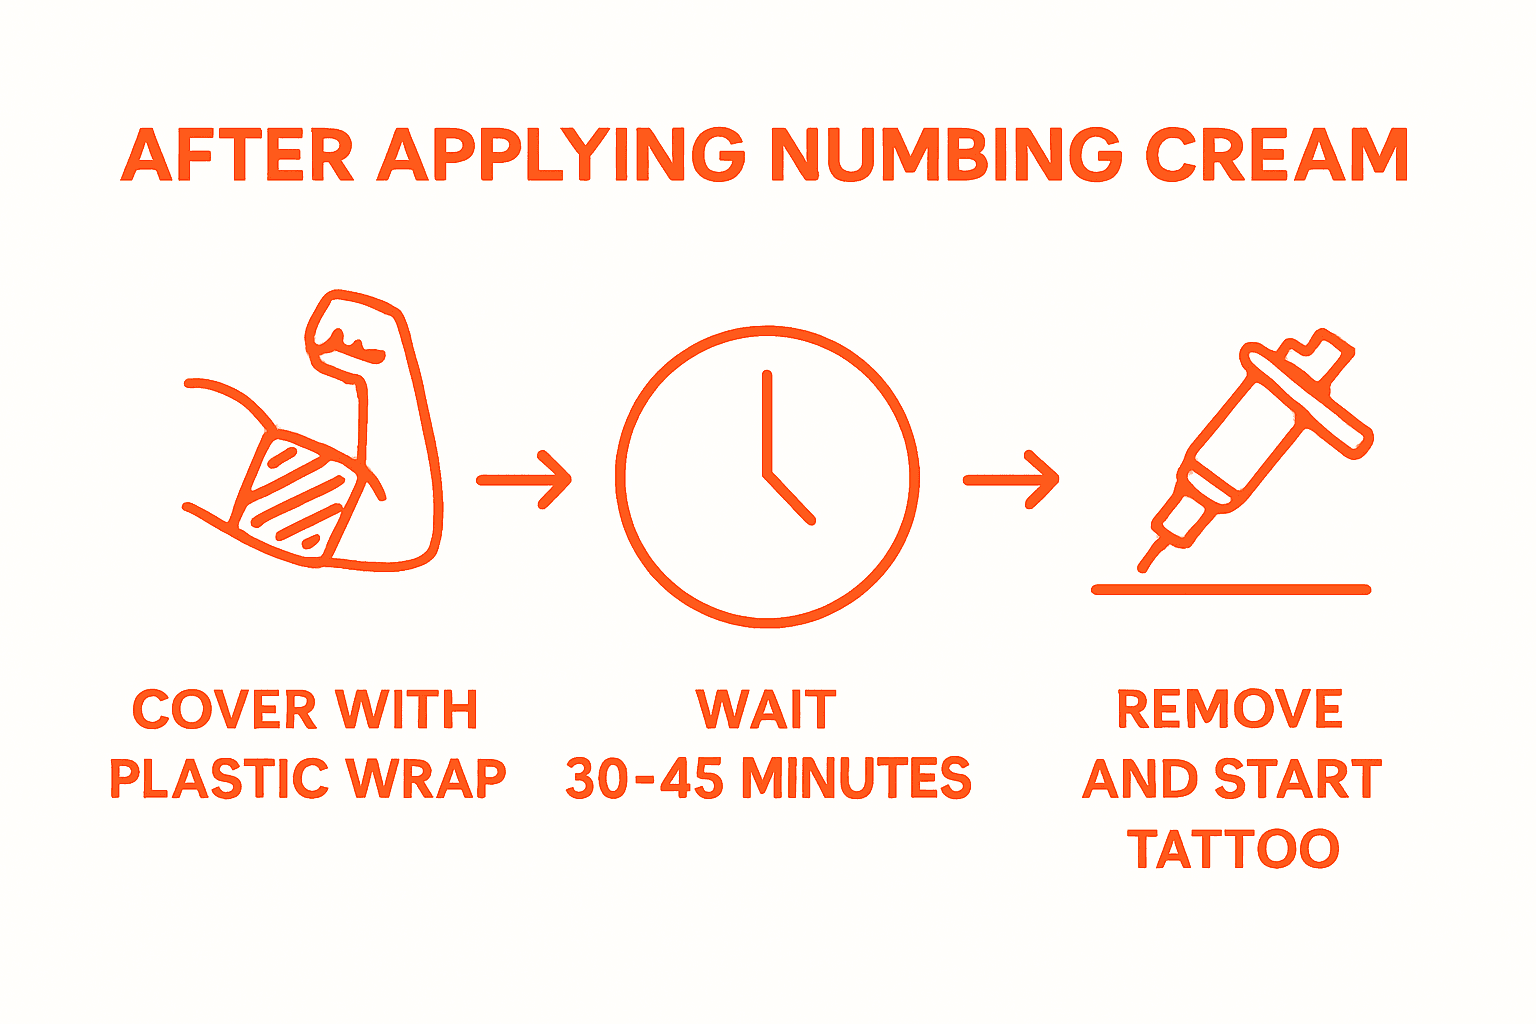
Cover the cream with an appropriate occlusive dressing to lock in the numbing agents and prevent accidental removal. Use a clean medical tape or specialized transparent film to secure the cream. Pay close attention to the recommended waiting time specified by the cream manufacturer typically ranging between 30 to 45 minutes before your tattoo session. During this period keep the area undisturbed and avoid touching or washing the cream covered section.
Pro tip: Use a clean plastic wrap or medical dressing to create an air tight seal over the numbing cream ensuring maximum absorption and preventing accidental smearing.
Step 4: Wrap and Wait for Maximum Effect
The waiting period after applying numbing cream is crucial for achieving optimal pain reduction during your tattoo session. This step transforms your preparation into an effective pain management strategy.
Cover the numbing cream with a proper occlusive dressing to enhance absorption and prevent premature drying. Use medical grade plastic wrap or a specialized non adhesive medical film to create an airtight seal over the cream. Ensure the covering is smooth and completely seals the cream against your skin without creating air pockets or wrinkles that might interrupt uniform coverage.
Follow the manufacturers recommended waiting time precisely typically ranging between 30 to 45 minutes. During this period keep the wrapped area undisturbed and avoid excessive movement or touching the covered section. The occlusive dressing helps the numbing agents penetrate deeper into the skin layers maximizing the cream’s effectiveness. Monitor the time carefully to ensure you achieve peak numbing effect just before your tattoo appointment.
Pro tip: Set a timer on your phone and stay in a comfortable position during the waiting period to help the numbing cream work most effectively.
Step 5: Verify Numbing Before Beginning Tattoo
The final preparation step is critical for ensuring a comfortable tattoo experience. Your goal is to confirm that the numbing cream has effectively reduced skin sensitivity before the tattoo process begins.
Carefully remove the occlusive dressing and wipe away the numbing cream using a clean medical wipe or soft cloth. Gently test the skin’s sensitivity by lightly touching the area with your fingertip or having your tattoo artist perform a quick sensation check. Look for signs of reduced sensitivity such as a mild tingling or complete loss of sharp sensation. Remember that some slight warmth or mild sensation is normal even with effective numbing.
Confirm the numbing effectiveness within the recommended time window typically up to 60 minutes after cream removal. If you experience insufficient numbness discuss alternative options with your tattoo artist. They might recommend reapplying the cream or using a different numbing technique. Be prepared to communicate openly about your pain tolerance and comfort level throughout the tattoo process.
Pro tip: Ask your tattoo artist to do a small test prick to verify complete numbness before starting the full tattoo to ensure maximum comfort.
The following summary outlines the five essential steps for safely and effectively using tattoo numbing cream:
| Step Number | Focus | Key Outcome |
|---|---|---|
| 1 | Select appropriate cream | Safe and effective pain relief |
| 2 | Clean and prep tattoo area | Minimized infection risk |
| 3 | Apply cream evenly | Uniform numbing coverage |
| 4 | Wrap and wait | Maximum numbing effect |
| 5 | Verify numbness before starting | Comfortable tattoo experience |
Achieve a Painless Tattoo Experience with Trusted Numbing Creams
Getting the perfect tattoo should not mean enduring unnecessary pain. This guide highlights the importance of selecting FDA approved numbing creams and applying them properly to ensure a comfortable and safe tattoo session. If you want proven products that guarantee effective pain relief for up to three hours, trust our specially formulated TKTX and Dermacain creams designed for tattoo numbing.

Don’t let pain hold you back from your dream tattoo. Experience the difference with our premium numbing creams available across Europe with free shipping on orders over 30 Euro. We stand behind our products with a customer satisfaction guarantee and easy returns. Take control of your tattoo comfort today by visiting our website to learn more and place your order now. For detailed guidance on using numbing cream correctly, also explore our comprehensive Tattoo Numbing Guide to ensure your preparation is flawless and your experience pain free.
Frequently Asked Questions
What are the key steps for using tattoo numbing cream effectively?
To use tattoo numbing cream effectively, follow these five key steps: select an appropriate numbing cream, clean and prepare the tattoo area, apply the cream evenly, wrap and wait for maximum effect, and verify numbness before starting the tattoo. Each step is crucial for ensuring optimal pain management and comfort during the tattooing process.
How do I choose the right numbing cream for my tattoo?
Choose the right numbing cream by prioritizing FDA-approved products designed for dermatological procedures, reviewing the ingredient list and concentration of active agents, and following professional recommendations. Conduct a patch test on a small area of skin at least 24 hours prior to your tattoo to check for allergic reactions or sensitivity.
How long should I wait after applying numbing cream before my tattoo appointment?
After applying numbing cream, you should wait between 30 to 45 minutes before your tattoo appointment to achieve maximum numbing effect. Use a timer to ensure you do not exceed this waiting period, as it is essential for the cream to penetrate the skin effectively.
What should I do if the numbing cream does not seem to work?
If the numbing cream does not provide sufficient numbness, discuss alternative options with your tattoo artist. They may recommend reapplying the cream or using a different numbing technique to enhance your comfort during tattooing.
How can I ensure the best absorption of the numbing cream?
To ensure the best absorption of the numbing cream, apply a thick, even layer over the area and cover it with an appropriate occlusive dressing. This helps lock in the numbing agents and prevents premature drying, optimizing the cream’s effectiveness.
Why is it important to clean the tattoo area before applying numbing cream?
Cleaning the tattoo area is vital to remove dirt, oils, and surface bacteria, which helps minimize the risk of infection and ensures optimal absorption of the numbing cream. Use mild antibacterial soap and warm water, and ensure the area is completely dry before applying the cream.


